Sequencing & Midi #
Sequencing #
The definition of a sequence is pretty obvious, but don’t be misled by the name- a “sequence” is not always just a list of notes to be played one after the other. Sometimes there’s overlap, gaps (rests), bends from one note to another (legato) and almost always information about how hard a note is pressed and how long it should be held for are saved. To whet your appetite before I go more into the weeds, I recommend this video from Red Means Recording:
Step Sequencing #
The easiest to understand sequencing method is step sequencing. You’ll generally see two types of step sequencing: Pitch & Trigger. Let’s look at trigger, which is usually used on drums, first:
Drum Sequencing #
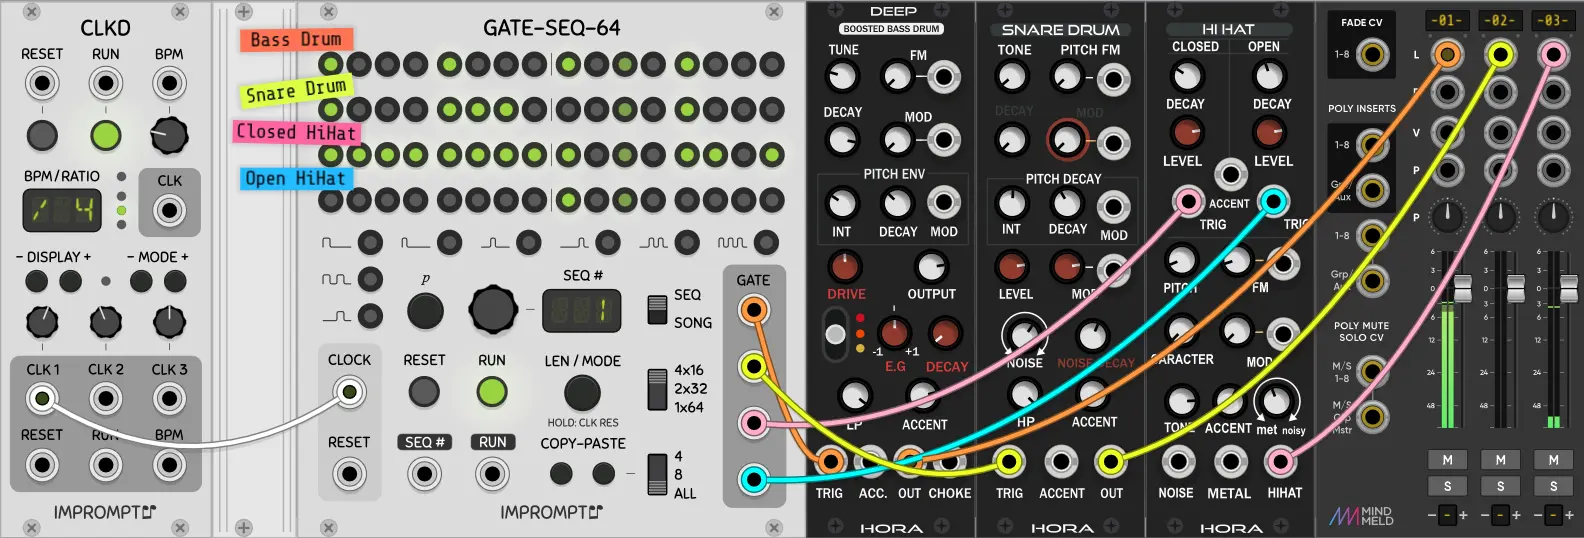
This should automatically loop, but there may be a slight delay when it does. The darker green dots just indicate the sequencer’s position when I took the screenshot
Here, I’ve set up a simple step sequence in VCV rack, the gist is that on each clock pulse (beat) the sequence moves right by one step, until it loops back around. If the light is lit, that row will output a trigger.
So, on that top row, we have
| 1 | 2 | 3 | 4 | 5 | 6 | 7 | 8 | 9 | 10 | 11 | 12 | 13 | 14 | 15 | 16 |
|---|---|---|---|---|---|---|---|---|---|---|---|---|---|---|---|
| X | - | - | - | X | - | - | - | X | - | - | - | X | - | - | - |
Which, effectively, just means the bass drum will play on the 4th beat, endlessly. This gives the bass drum a super basic, repetitive pattern. If I had done every other beat, it would just be twice as fast. You can see how the other drums have more complex patterns, and you should be able to look at the screenshot above and see how that pattern matches the sound.
This setup for a step sequencer is almost painfully simple, and doesn’t leave a ton of options. Probably the biggest missing thing here is velocity, which means there’s not a way in this patch to adjust the volume of each hit
Before moving on, I do want to help you actually make these simple step/gate sequences. For as simple as it sounds to make basic drum sequences, it’s really not. You’ll often end up making just really basic 4-on-the-floor techno (with exactly the bass drum as in the demo sequence above) or something that has at least one percussion hit on every step and gets too busy
Velocity is a big deal #
If you trying to sequence drums the velocity (how hard/loud) of each hit matters more than you might think. A pattern that might sound outright terrible without velocity variation can sound great with it. If you think your drums are missing something, try changing up the velocity before you reach for adding more sounds.
As an example, here’s a simple drum pattern where the only difference is the velocity being constant or sequenced for the snare part.
More info on drum sequencing #
There’s a lot of good info on drum sequencing on YouTube. Watch, practice, repeat.
Note and Value Sequencing #
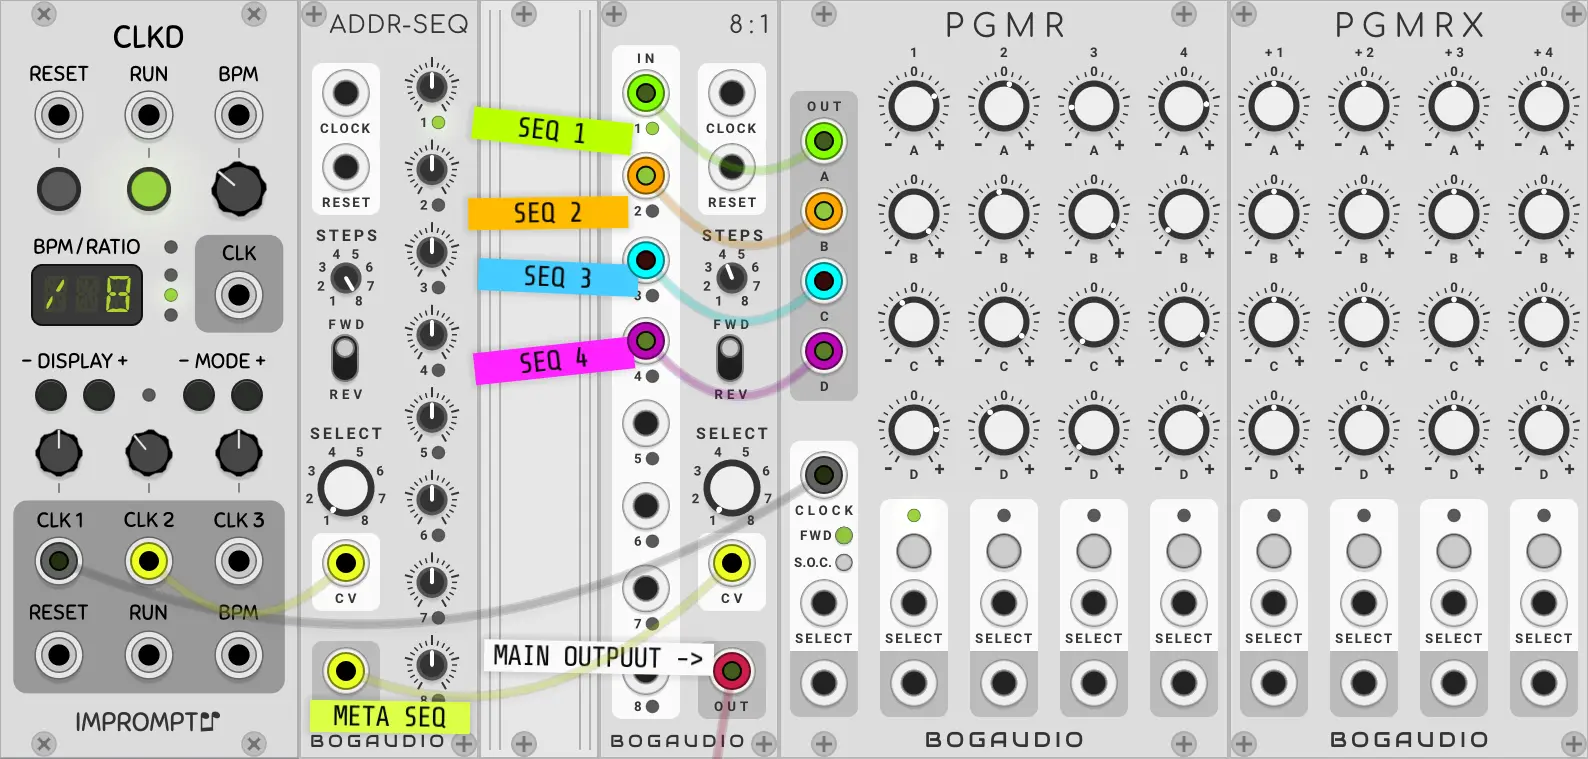
With a value step sequencer, each step has a corresponding knob (or slider) and outputs that knob’s value when it is the active step, so now instead of a binary on/off at each step, we’re setting a value.
Here’s a little gif showing this in action. Here, the steps are simply descending in value, as you can see from the downward staircase on the scope as well as the knobs being turned down on each successive step.
These values could control anything. The most obvious is the pitch of an oscillator to make a musical pattern, but you could just as easily have them control other parameters too: filter cutoff, volume, amount of an effect, whatever.
To actually hear this in action, here’s a patch demonstrating multiple sequences working together. In this patch, the PGMR module is a multi-lane sequencer, which really just means that at each step there’s more than one knob, because there’s more than one output.
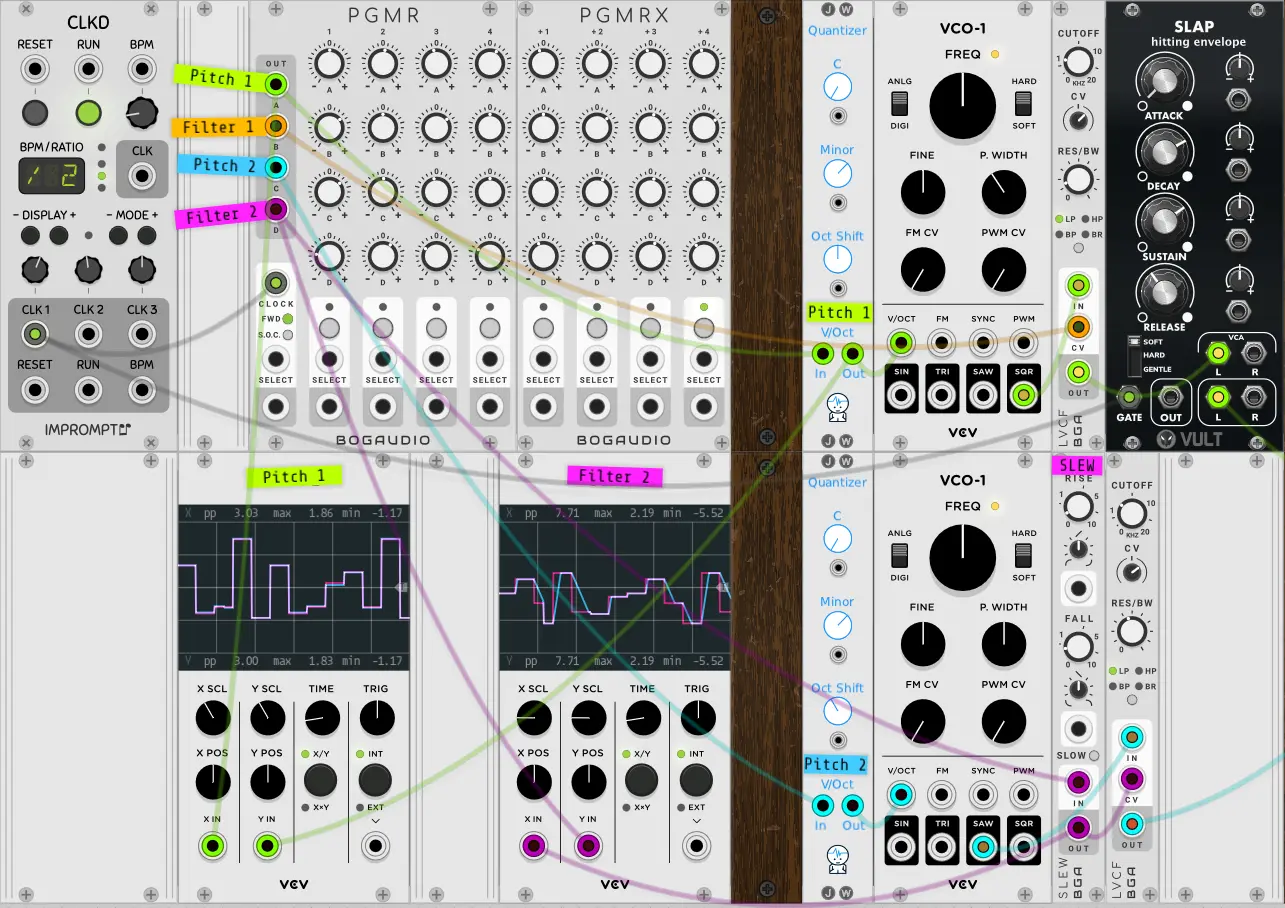
Here, I’ve setup two simple synth voices, one on top, one on bottom. The green Pitch 1 Sequence controls the pitch of one voice, while the blue Pitch 2 sequence gets the pitch of the other. Similarly, each voice has a filter and there’s two sequence controlling the filter’s cutoff frequencies.
Some of the complexity here comes from trying to make these values fit into shapes we want. For both pitch sequences (green and blue) they need to pass through a Quantizer first, which just makes sure the values coming out of the sequencer are actual notes, not just random pitches that don’t even correspond to a key on the keyboard. See in the bottom left scope how on the step between the TIME and TRIG knobs there’s both a blue line and a pink line? The pink line here is the value after the quantizer, and you can see there is a difference, so it is doing something.
Looking at the second scope, you can see in pink the original signal coming from the Filter 2 sequence, and in blue the signal after passing through a Slew limiter which is making it have smoother transitions, instead of the sharp transitions (vertical edges) of the original sequence. This is just making the filter transition a little smoother. If we had done this to the pitch sequence after the quantizer we’d have a legato effect instead.
Getting Some Variety #
One thing you should notice pretty quick once you start playing with sequencers on your own is that they get incredibly boring. The repetition repetition repetition will drive you mad. Fortunately, there’s a ton of neat sequencers out there, and even most of the basic ones can be used in interesting ways to keep them moving. Even looking at the sequencer in the above patch, with only 8 steps, you can change the direction to make it run backwards or hook up other events to make it jump to a particular step.
Instead, you’ll probably want to run something which does it more natively. Most DAWs support this idea pretty easily, but if you’re looking for something in VCV and willing to pay, the ZZC Phaseque is pretty nice. Another way to do it is using the Stoermelder 8FACE mk2 and any sequencer (like the PGMR used so far) but that setup is still a tad awkward. (or the Stoermelder Transit if you want to morph between sequencer states, but that’s sorta weird?)
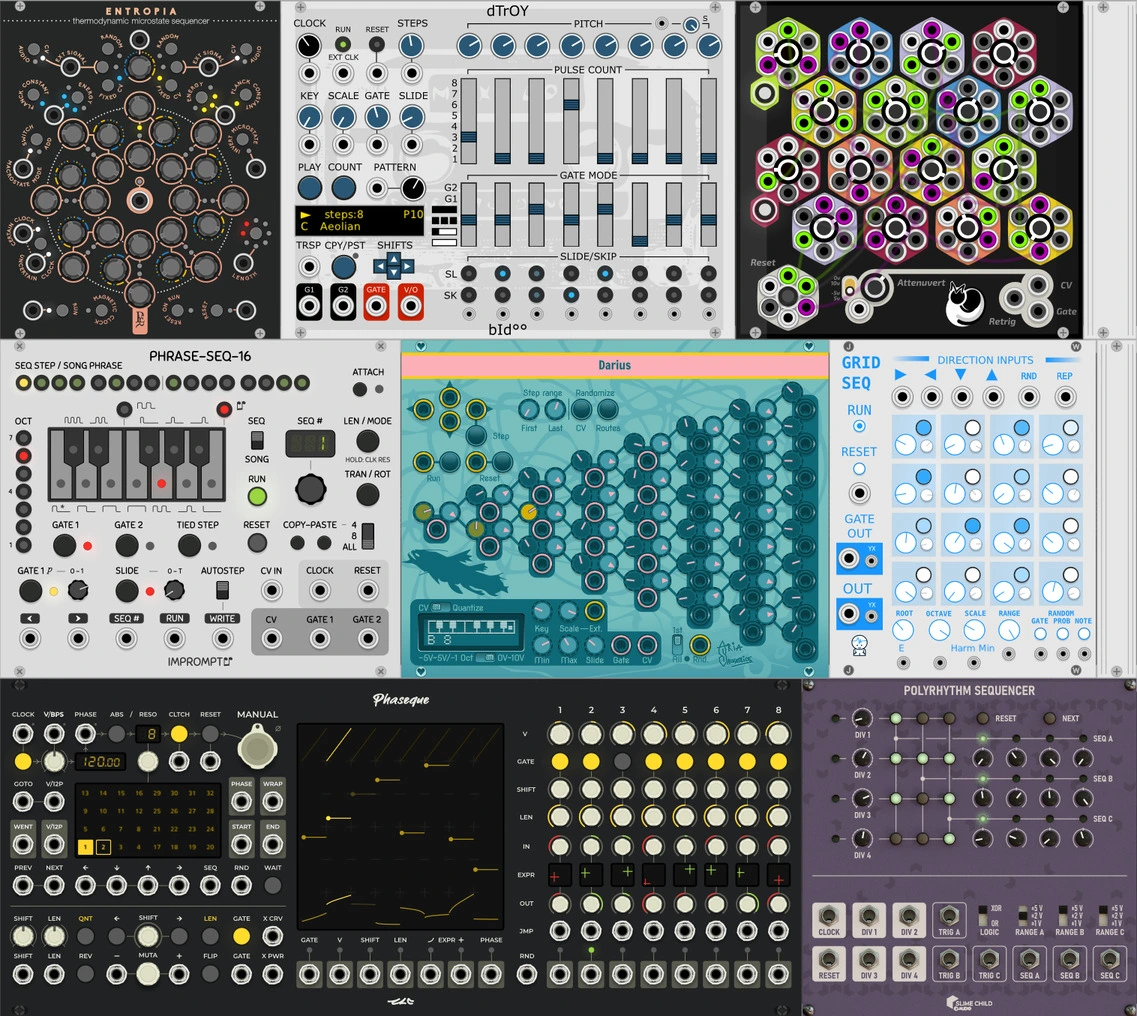
Pictured, L→R, T→B: Geodesics Entropia, Bidoo dTrOY, Mog Network, Impromptu Phrase Seq 16, Aria Salvatrice Darius, JW GridSeq, ZZC Phaseque (non-free), Slime Child Audio Polyrhythm Sequencer (non-free) all running in VCV Rack
Piano Rolls #
Probably the most common way of entering a sequence is using a piano roll
Piano rolls get their name from player pianos, as they had actual rolls of paper with holes cut in them that represented the notes to be played. The gaps allowed for little pins of metal to push through and make contact, completing a circuit and driving electronics to hit the note, making it play on a real piano.
Clearly, we don’t want to be taking a hole punch to paper to make our music- we want to use a computer! But, despite how much everything has changed…

Image by Draconichiaro, CC BY-SA 4.0, From Wikipedia
The idea is still pretty much the same:
Timeline #
[TODO]
Breaking The Loop (Patches.zone)
random, sample/hold, probability, piano rolls, trackers, AI based, euclidean, trigger/gate/len, humanization
Creating Melodies [Music Guides from Ableton]
Ways to turn tiny ideas into bigger tracks (YouTube, Andrew Huang)
Song structure ABAB, ABBA, ABAC, etc.
Bpm changes, key changes, hooks, drops, ‘flavor’ with added samples
Euclidean Sequencing #
Generative Sequencers #
ORCΛ #
Mutable Instruments Grids & Marbles #
Turing Machines #
Sequence Modifiers #
[TODO] Geodesics Fate, …?
MIDI effects #
Arp, velocity, pitch bend, mod, sustain, generative, legato
Multitracking #
Multitracking Synthesizers for Fun and Profit (YouTube, RedMeansRecording)