Chapter 26 - Embedded Systems #
If you’re reading this page, it’s expected that you’re either pretty comfortable with C and programming on a normal computer already or that you’ve at least read though both the programming intro chapter starting with
“Lets Write Some Code” and the “Low Level Programming” pageWhat is an Embedded System? #
[TODO] need source
An embedded system is a computer system—a combination of a computer processor, computer memory, and input/output peripheral devices—that has a dedicated function within a larger mechanical or electronic system.
- Wikipedia
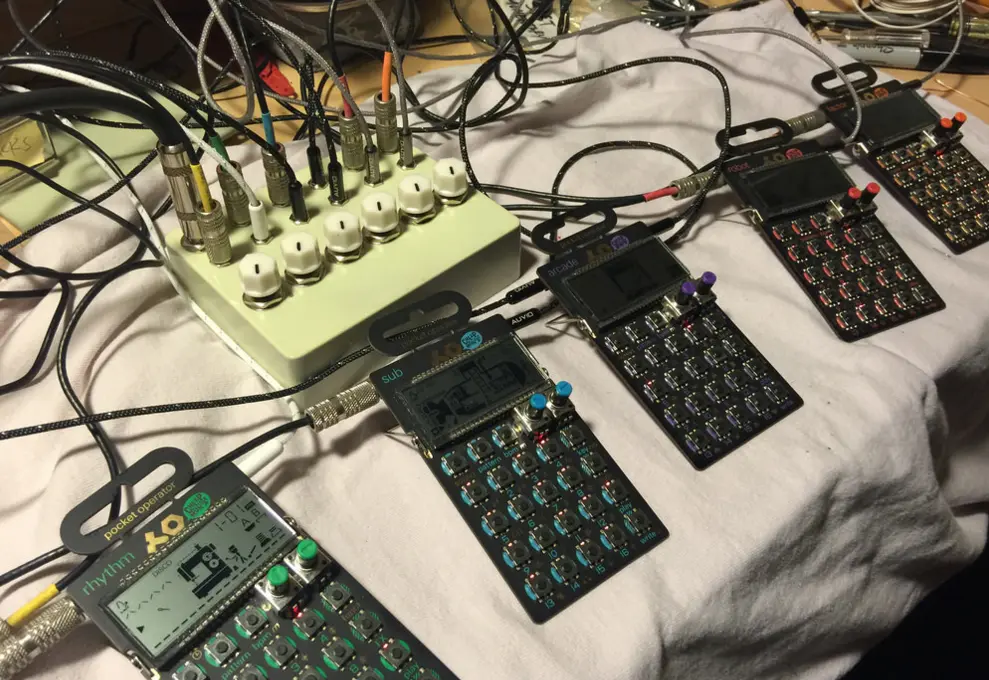
Alright, so how do these pocket operators show this well? Well, the pocket operators have a Microcontroller on them as well as a fair amount of things connects to it, but let’s hang on for a second- Microcontroller? Microcontrollers, sometimes written as μC, MCU, or just micro are the heart of most embeded projects
A microcontroller is a small computer contained in an integrated circuit (IC) chip. A microcontroller contains one or more CPUs (processor cores) along with memory and programmable input/output peripherals. Microcontrollers are designed for embedded applications, in contrast to the microprocessors used in personal computers.
Microcontrollers are used in automatically controlled products and devices, such as automobile engine control systems, implantable medical devices, remote controls, office machines, appliances, power tools, toys and other embedded systems.
- Wikipedia, minor edits
Alright, so that’s a lot of words. The gist of it is you’re getting a tiny computer that’s roughly comprable in specs to a computer from the 80’s, but is inexpensive (usually under $2.00, especially in bulk) and that has a ton of pins that you can connect other things to- LEDs, motors, buttons, etc.
These computers usually don’t run a full operating system, and instead usually just run a loop of your code forever. They also usually have some special pins that can do things like read analog voltages, communicate over SPI or \(\text{I}^2 \text{C}\) , trigger interrupts, or be used for PWM (Puse Width Modulation).
Probably the most commonly recommend microcontroller for beginners is the ATMEGA328P on the Arduino Uno. The 328P and Uno are both… not awesome. But, for first learning and getting your toes wet they’re fine.
It’s worth noting, the μC itself is the Atmega328P- the really big black rectangular chip. The board that breaks these pins out to the headers for you to plug wires into, provides the USB connection, power filtering, reset button, etc. is the Development Board- in this case it’s been named the Arduino Uno.
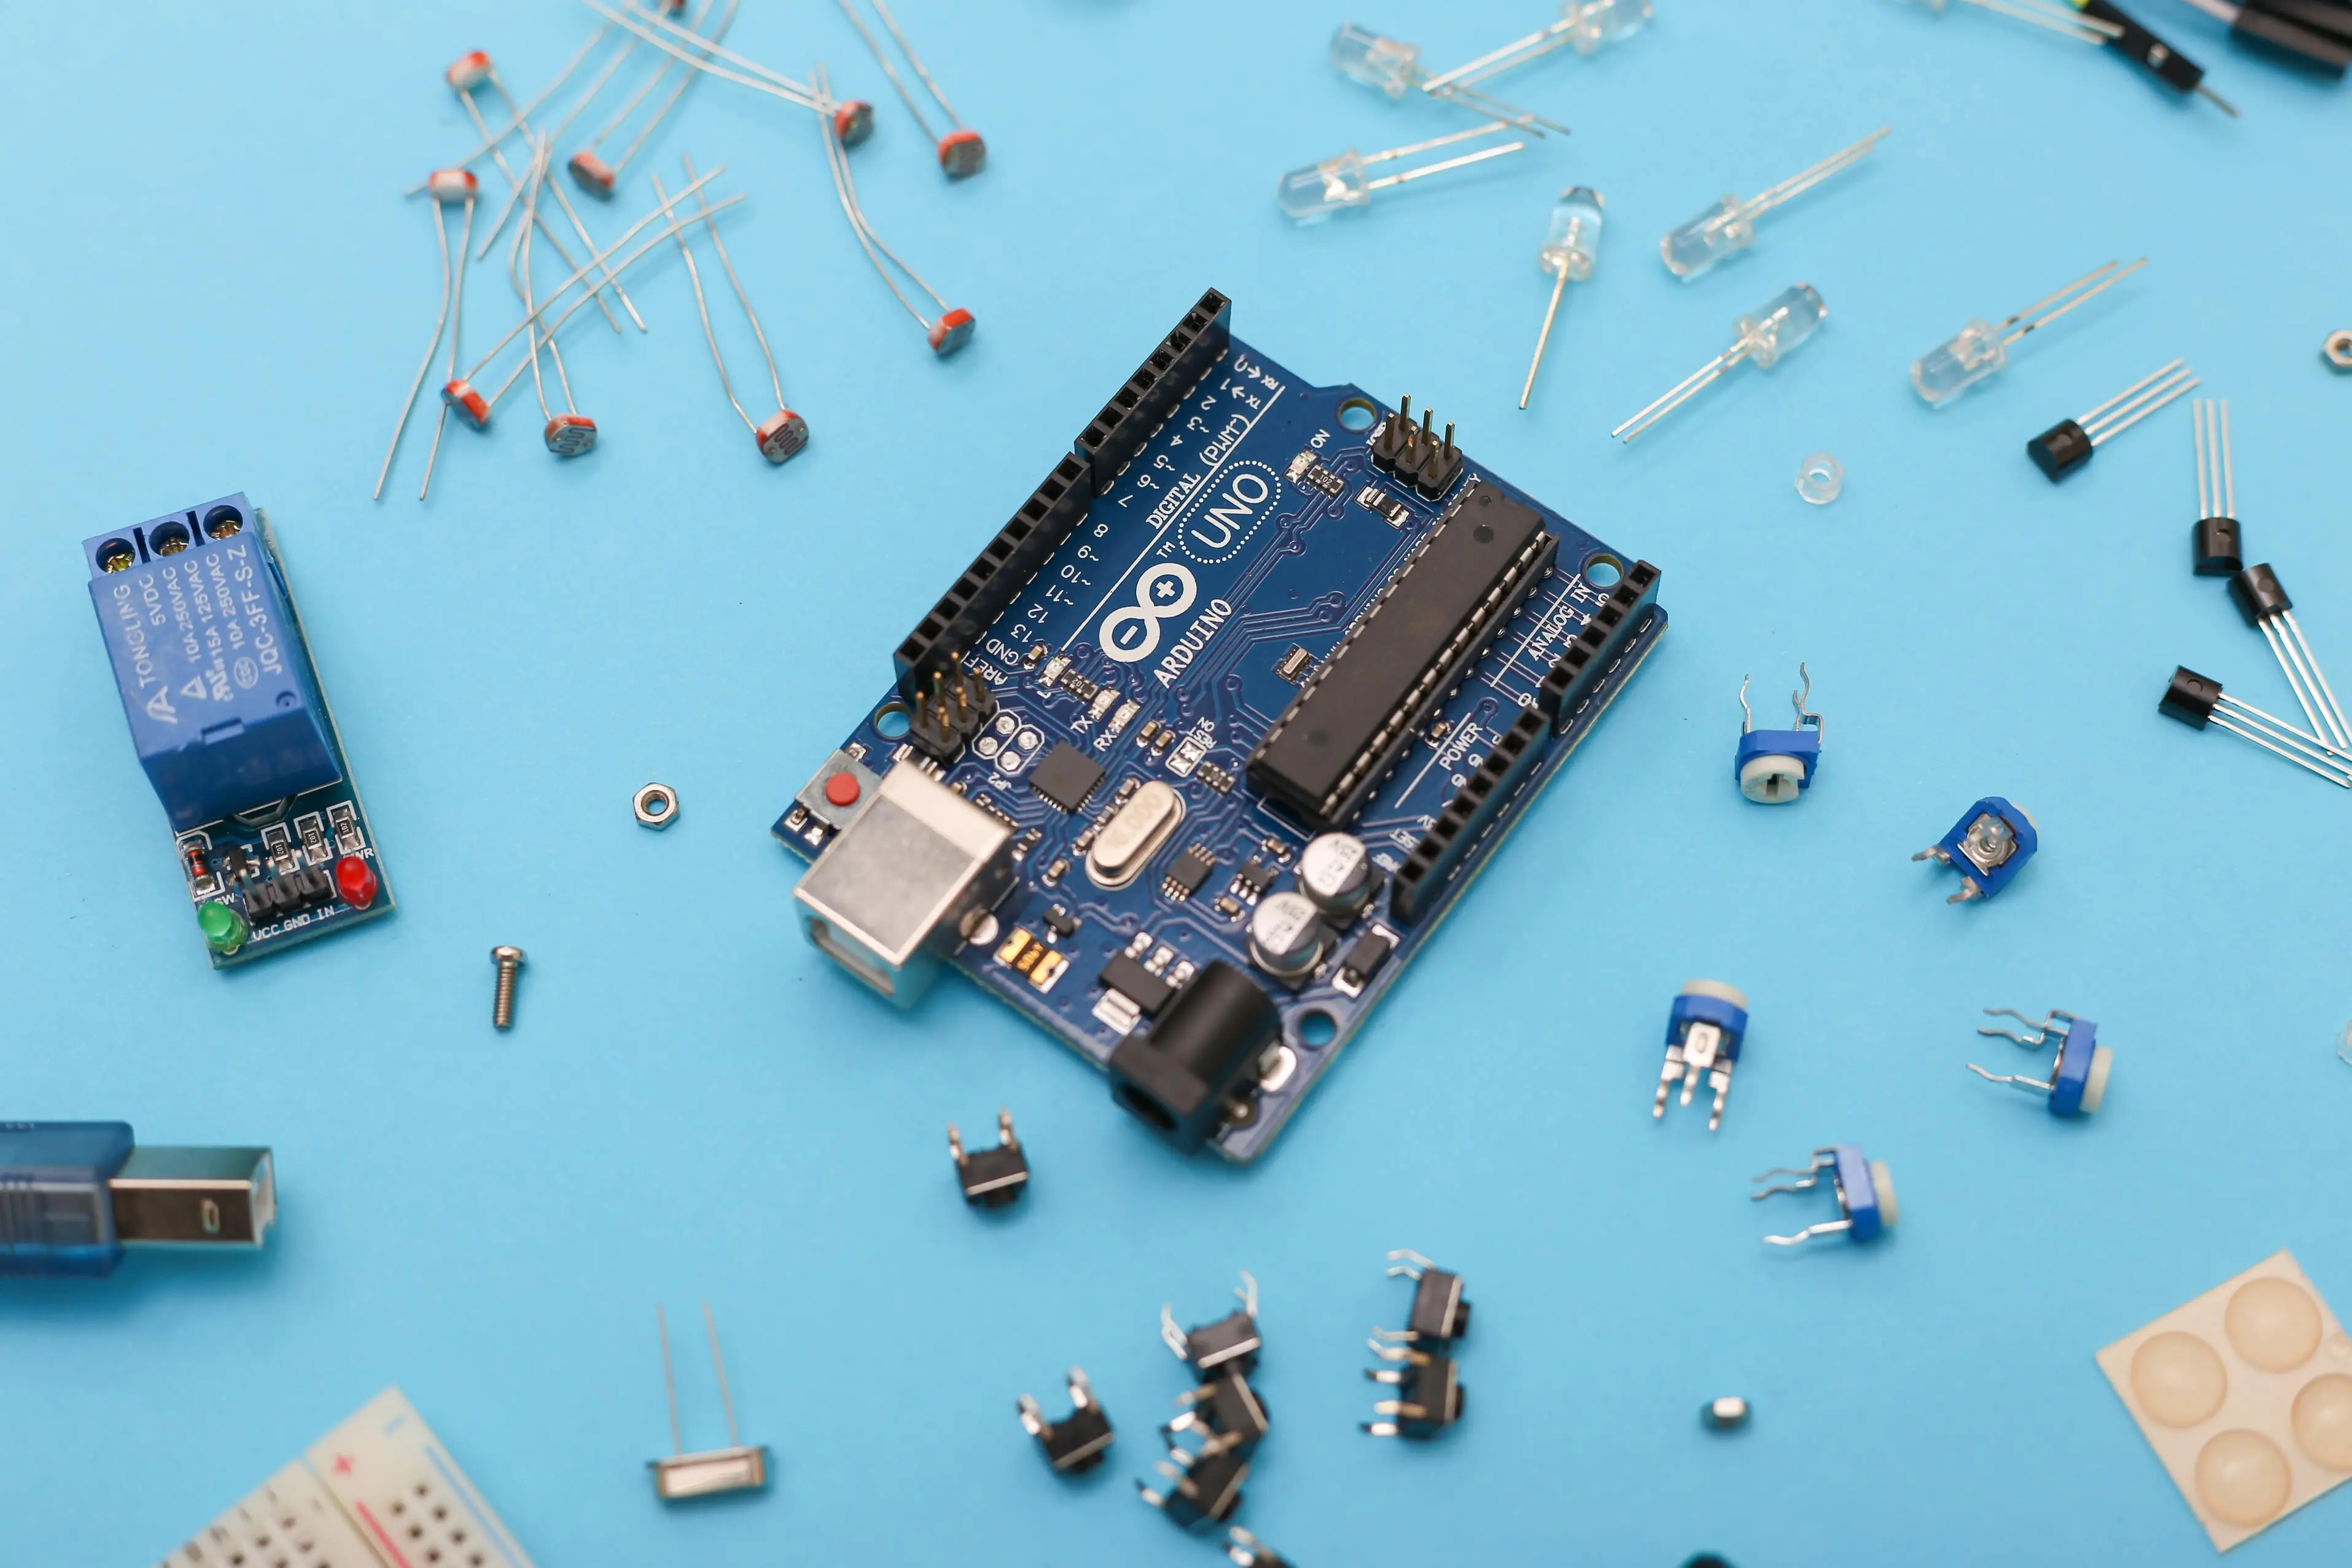
Image by Sahand Babali
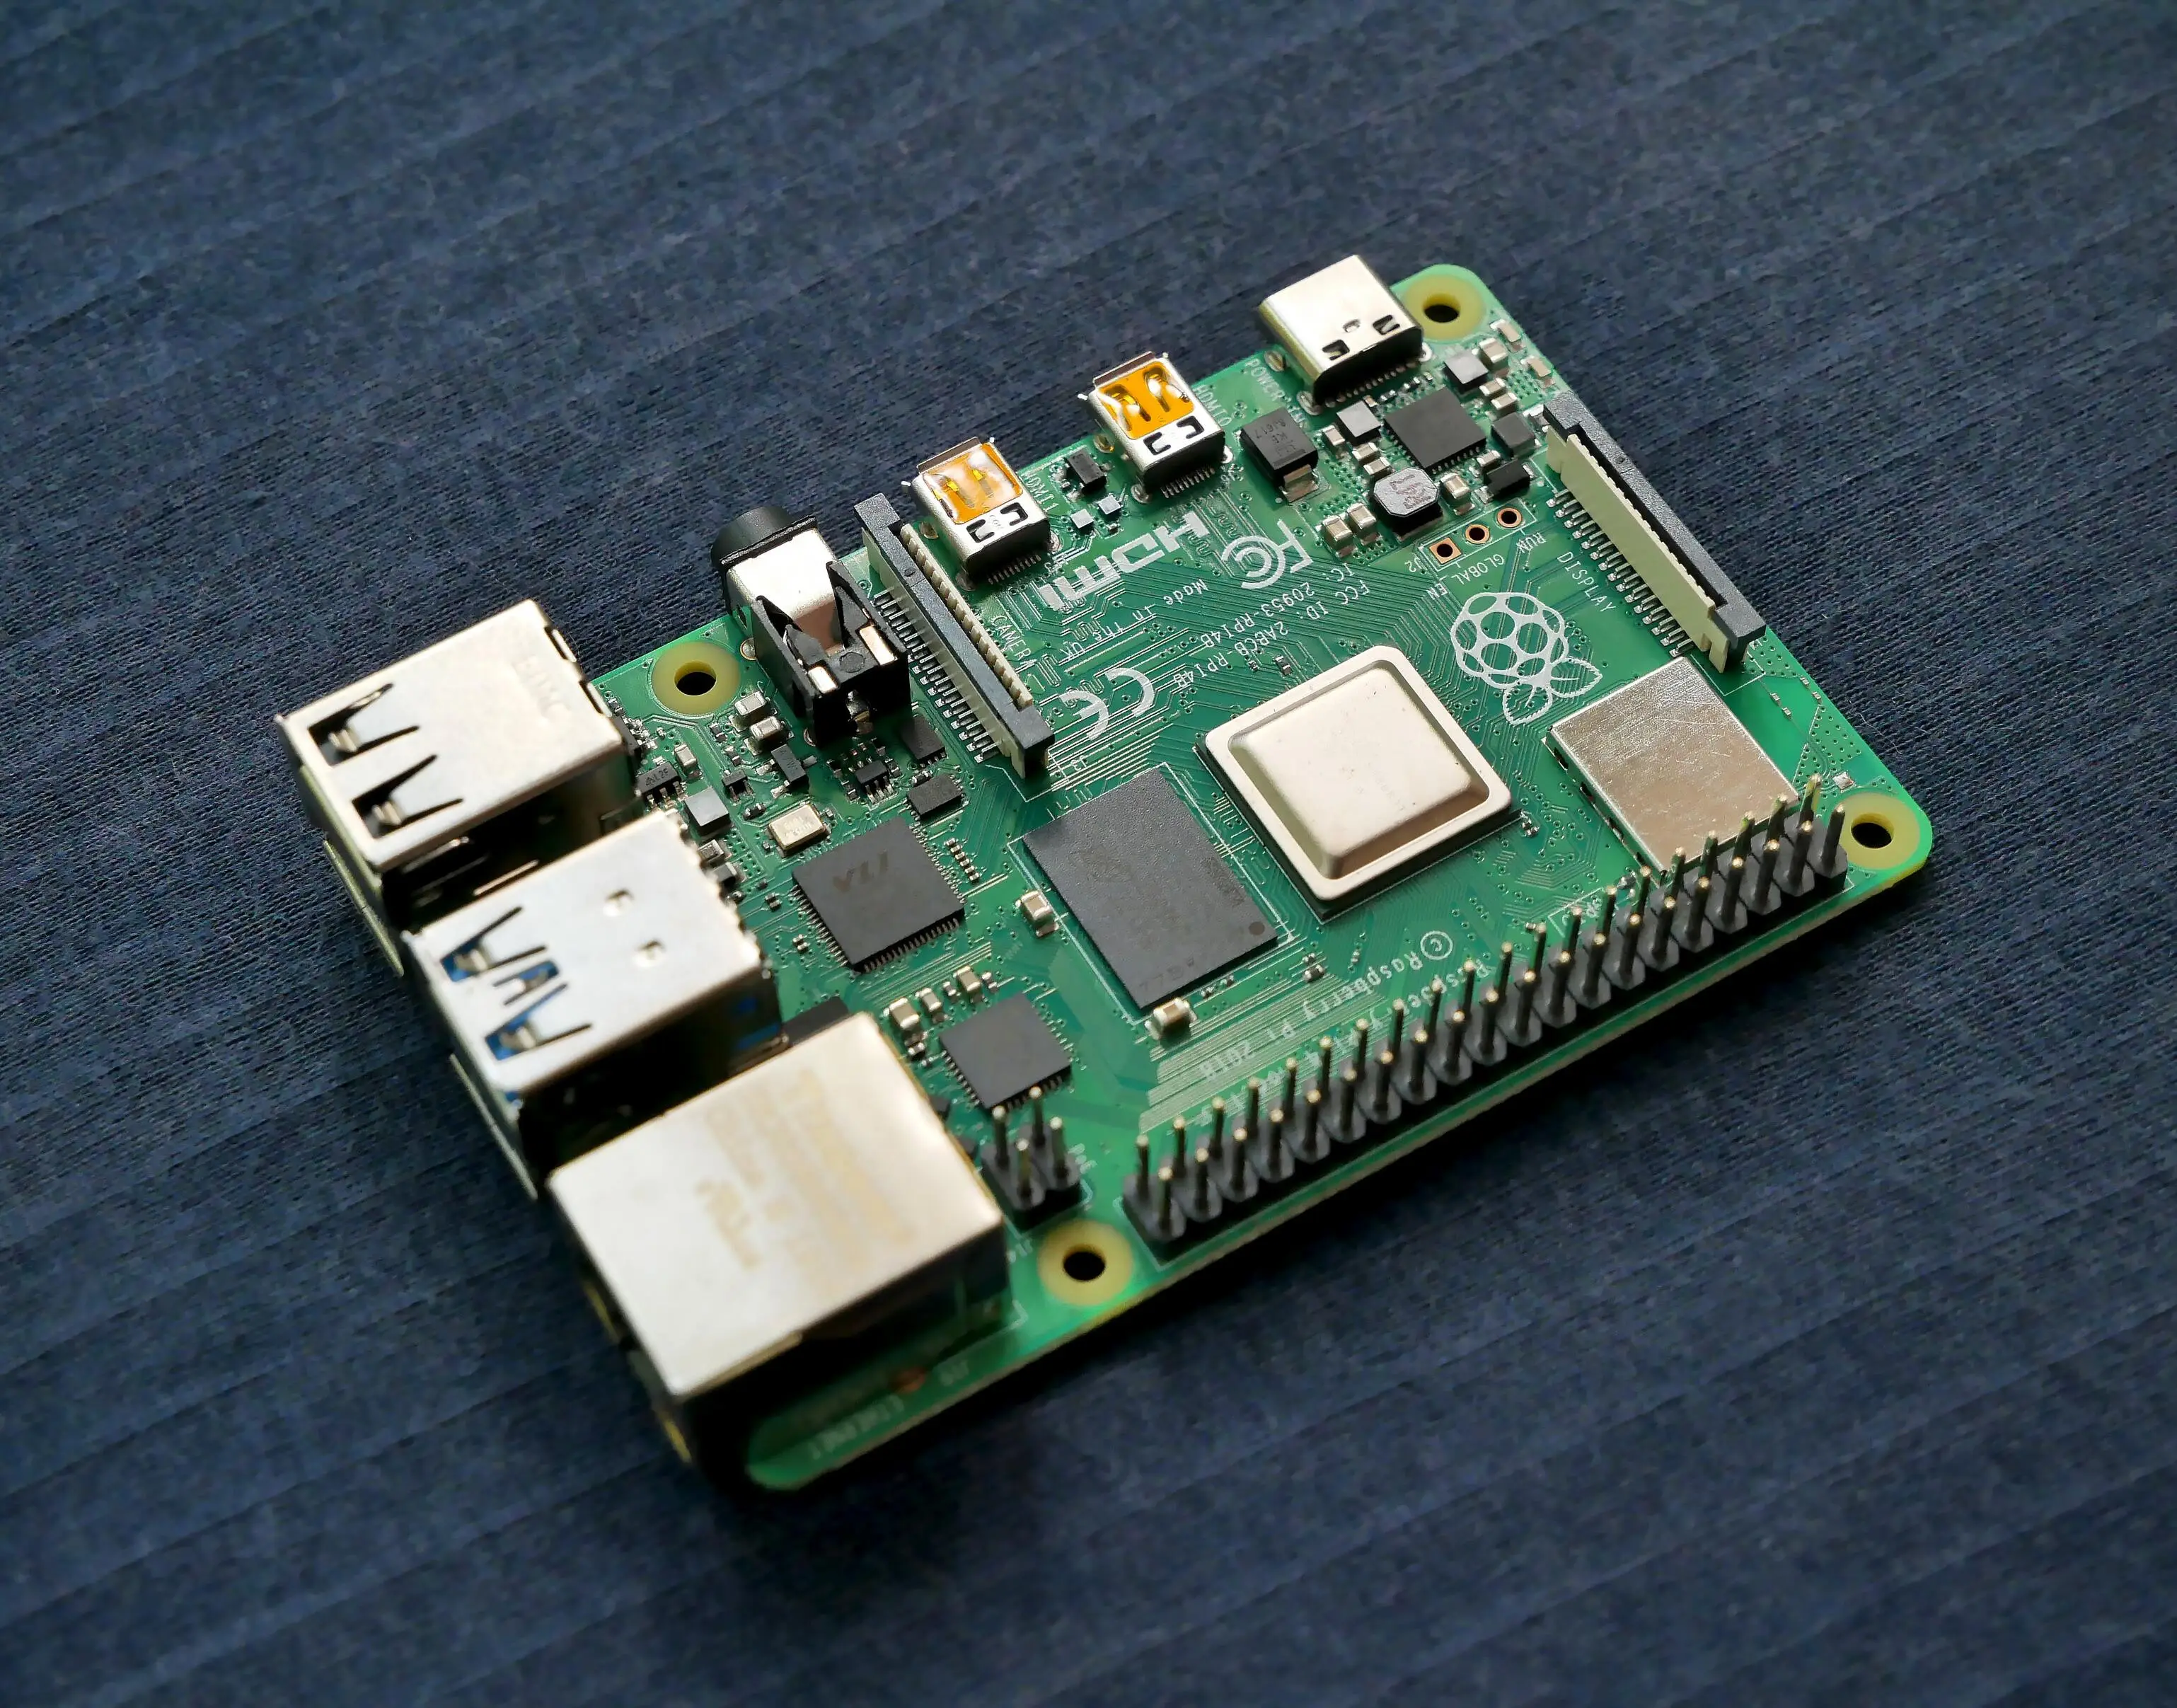
Image by Vishnu Mohanan
More confusing still, the Pi itself has multiple embedded systems in the embedded system- for example the dedicated chip on the Pi3b+ that provides the Ethernet connectivity could be considered part of its own embedded system. Yet, the Pi has General Purpose Input Output (GPIO) pins like most microcontrollers.
All of this is to say, don’t worry about it too much. As you work with it more, you’ll learn the differences. This is all just jargon anyway, and sometimes not everything fits cleanly under a single label. Instead, you should focus on what matters: Knowing what parts to use, what features they offer, and how to program them to do what you want.
For the rest of this page, I’m going to be talking about embedded systems that don’t have processors beefy enough to run Linux - those are usually called “Single Board Computers” or SBC’s anyway, just because they’re really in an entirelly different weight class and price bracket. If you know how to work on the classic μC embedded systems as I’ll dicuss going forward and you know how to do general desktop development, making software for a Single Board Computer, such as the Pi, is really just a blend of the two and should come pretty naturally.
Playing around - Hello World and blink #
Alright, so you have a microcontroller, presumably on a dev board, maybe even aforementioned Arduino Uno (though seriously, the 328p is trash- coming back to that in a bit) but you want to make it do something. Generally, the first thing you’ll want to do with a devboard is the exact same as you do when learning any programming language, make it say “Hello World”. Now, this is pretty easy, if you have a controller that can run the Arduino framework (this is more than just boards from Arduino- Arduino the framework runs on a bunch of other boards that aren’t made by Arduino the foundation), you can download the Arduino IDE, write this code:
|
|
Connect your board, press upload, and if you go to Tools → Serial Monitor you should see the Arduino send back the words “Hello World!”. Now, this is super not exciting, as it doesn’t really seem any different from just running similar code on your computer. However, keep in mind that code spitting out that text didn’t execute on your computer. It ran on that lil’ board, and then that text was sent back over the USB cable.
But, there are a few things I want to address first:
- The Arduino IDE is fucking garbage (for now, it should be getting better with Version 2.0)
- This code leaves a lot obscured.
- Where is
Serialfrom? - Why are we not just using
printf()? - What’s up with
setup()andloop()instead ofmain()? - Why
9600?
- Where is
So, to answer 1. - Yeah, don’t use the Arduino IDE. For now, the best option is PlatformIO on VSCode.
To rapid fire 2. - Serial is from a library that gets installed by default with Arduino and by using a call to it in your code, the Arduino IDE links it in for you, without the need for #include like we saw back in the low level programming chapter. This may sound nice, but it’s actually really annoying. There are a bunch of libraries like this, and often you won’t realize you’re even using something non-standard- like setup() and loop() Arduino actually has a file sitting elsewhere that literally has the code:
|
|
which, while may look a bit weird, you’ll see does contain our typical main() and just executes setup() once then whatever we put in loop() in an infinite for loop. It also contains #include <arduino.h> which will include if you dive into you’d see includes the Serial library too.
Okay, but WTF is “Serial”? Why not just use printf()
Okay, so, there’s a few things here.
First, the “arduino” framework isn’t actually C it’s C++ and the standard way printing is done in C++ is a bit different anyway - yes, you can use printf() in normal desktop programs in C++, but you usually want to use a syntax closer to this
cout << "Hello World!";
But, more improtantly, C++ is also object oriented, so we’re calling the println() function from the Serial class - it’s an entirely different language. Again, not a big deal to think about right now. There are two take aways you need to really answer your question
printlnis basically just aprintfthat add’s the newline for usSerialis a class that gives provides us functions for working with the serial interface hardware on the board
Now, 2. Is the more important and more confusing point and requires a smidgen of historical context.
You connected the board to your computer over USB or Universal Serial Bus. Prior to USB we also had … Serial. Just… Serial. USB can (with a lot of hand waving to what is actually going on) let devices show up as old school Serial devices though. If you’re on Windows, these will show up as com ports (COM4 or whatever) on Linux, they’ll show up as /dev/ttyACM0 or /dev/ttyUSB0 (with the number incrementing depending on the number of devices) - this old school serial connection is pretty damn slow but basically just gives us a way to send data (usually text) back and forth to a device - allowing us to print that data to a terminal or send data from a terminal.
This is why we can’t just use printf() - where would that text even show up?! There’s no screen on the board! no terminal. We need to send the data back to the computer over the serial interface to have a way to read it!
Finally, just to be though, that 9600 which may seem like a magic number, is the baudrate the board was sending data to the computer over Serial. 9600 is stupidly slow, yet is the default that many programs with the Arduino framework will use- most boards can do 115200, which is 12 times faster.
Really, most of this abstraction is just in our way. This isn’t C++’s fault, the Serial class providing functions like println and having encasulated functions for setup - great, that’s well made. Not including serial.h ourselves or having a convient tool for looking at how the underlying libraries tie together? That is a dumpster fire.
There’s no need for all of that to sit between us and the code!
A lot of “Makers” will only learn to use the Arduino functions and way of doing things. Yeah, they might make some things easier, but long term they’ll seriously limit what you can do. I love “Makers” and “Hackers” and consider myself one, but if you use the title as an excuse to not learn how shit works, you’re doing it wrong.
Sometimes, a quick n’ dirty solution will work. If you just want to make some LEDs blink or switch a relay to turn something on and off, sure. The problem is, sooner or later you’ll find something where you need fast response times and need to use interrupts, or where you need to get fine control over PWM and need to twiddle bits, and the Arduino library will make doing so a massive pain in the ass.
So, let’s try this again, this time, don’t use the Arduino IDE, but grab PlatformIO and make a new project.
I’ll assume that most people reading this are- despite how much of a massive pile of shit they are- using an Arduino Uno (or clone). If that’s all you have, frankly, the Arduino library is still your best bet for some things, so when you make a new project because it does provide some things that are a total pain to do by hand, like setup aforementioned Serial. That said, the other library that works in PlatfromIO for the Uno, Simba is pretty cool and will abstract out a lot of that mess too.
The biggest reason to use the Arduino framework is that there’s a mountain of libraries written for it, so if you get a little board for RFID or temperature sensing or GPS or whatever, there’s probably already a drop in library with example code. But, frankly, the 328P is so under powered and old that I just can not justify learning on it. Instead, I’m going to recommend the STM32F411CE - or, as it’s more commonly known, the “Black Pill”
But, I hear you asking, “why?”
| Arduino Uno/Nano (328p) | BlackPill (STM32F411CE)* | |
|---|---|---|
| Price | ~$6.00 | ~$6.00 + ~$7 debugger |
| № Bits | 8 | 32 |
| Clock Speed | 20Mhz | 100Mhz |
| Program Memory | 32Kb | 512Kb |
| Ram | 2Kb | 128Kb |
| I/O Voltage | 5V | 3.3V (lots of 5V tolerant pins) |
| Debugging | Kinda, but not really. | With ST-Link |
| USB | that big ol’ printer style on the UNO, or micro-usb on the Nano | USB-C |
*The STM32F401CE boards are a smidgen worse, but honestly, they’re both so good it probably won’t matter to you. Get whatever is cheaper.
Even if most of these specs don’t mean anything to you and whatever projects you have in mind don’t need a beefy processor, while learning espcially you don’t want to be constantly running out of RAM or room to store your code.
If that doesn’t convince you, then I don’t know what will. Oh, and the BlackPill still supports the Arduino framework, if you do actually need it. Now, to be fair, there’s a lot more to this than these specs. The 328p will almost certainly have better library support than the BlackPill, the Uno has a bunch of snap-on accessories, and some things do actually work better with the 5V i/o of the Uno. It’s just… sort of dumb to start on something so old and so far removed from modern practices.
You’d also want to consider what protocols and inputs the boards can handle. In this case, the BlackPill is basically better in every way in that front too. If you were looking at other options though, some boards may not have analog input pins, for example, and that might be a dealbreaker for some projects. I’ll talk more about how to find the right μC / Devboard for your project later, for now, let’s move on assuming you have the BlackPill in front of you.
So, let’s try making our Hello World! again.
[TODO] Blinking the onboard LED
[TODO] Using the Arduino framework in PlatformIO, then setting up STM32CubeIDE because it’s actually good. But explain that PlatformIO is still great because of support for ATmega, ESP8266/32, bigger STM boards like the STM32F7xx, Longan Nano, BBC Micro:bit, pi pico
PWM, SPI, I2C, What’s going on?! #
Alright, so making the board send text to the computer or blink an LED is cool and all, but, that’s not really all that interesting. Let’s go further, lets… uh… blink a different LED!
[TODO] LED pull up/down
[TODO] PWM dimming, show in slo-mo
[TODO] WS2812b, but without a library
Alright, hopefully you’re not totally bored by making lights flash, let’s have a bit more fun! We’ll start by looking at that Ultrasonic sensor
[TODO] ultrasonic sensor, basic digital input and timing, interrupts, etc.
Now, let’s look at that MPU GY-521 Gyroscope/Accelerometer
[TODO] i2c? SDA, SCL, and interrupt handling (not on all devices)
So, that’s i2c, which is nice, but sometimes you’ll want to talk to a device with full duplex communication. “Full duplex?” I hear you ask. Well, while \(\text{I}^2 \text{C}\) is a great protocol and is easy to use, it’s also only half duplex this means that, like a radio, only one side can talk at a time. Full duplex communication methods let both sides talk at once. While in a phone call this might be chaotic, there’s often times when it’s helpful to be able to send data to a device while we get data from it- for example, when working with that Ethernet adapter I said we’d be using above. For Ethernet, this is often necessary, as with TCP, a networking protocol I’ll dive into in the programming chapter, you need to repeated send replies saying “Yep, I got what you last sent, keep em’ coming” while still listening for more data.
[TODO] SPI Ethernet or SPI flash?
- SPI has four modes, depending on CPOL and CPHA
[TODO] mention UART & CAN bus
Driving a PAL TV over RF thanks to PWM harmonics (Hackaday)
Project 1 - Calculator #
[TODO] diode matrix inputs, LED matrix outputs (7-seg), beeper, what’s a memory mapped register, bit-fields, structs, basic polling, no return from main, ever.
Project 2 - MIDI Controller #
[TODO] Gyro + photo-resistor + a few knobs & buttons, interrupts
Project 3 - ADC to the DAC #
[TODO] ADC → μC →DAC, floating point, DMA?
Depending on the board you’re using (not the Arduino Uno) you may have a/multiple Digital to Analog Converter(s) (DAC), as well as Analog to Digital Converters (ADCs) which… do what you think. ADCs let you take an analog signal in - like the output of a guitar or the voltage as you turn a knob. DACs let you output a signal (like audio). Assuming you have enough computational horsepower and the DACs and ADCs on board are good enough, the combination of these could let you do everything from a guitar pedal to making your own radio (On top of just being able to read knob positions)
Unfortunately, DACs and ADCs are complicated, and you really should know a lot about them as they’re used a lot, so, without further-a-deux:
More about DACs than you probably need to know:
- Nyquist Rate vs Oversampling DACs
- Decoder-based, Binary weighted, Thermometer code, & hybrid
- Monotonictity & Linearity ; Integral & Derivative Nonlinearity (INL/DNL)
Some DACs & ADCs also allow for Direct Memory Access (DMA). A DAC with DMA, for example, will let you write samples to a buffer and at a defined rate spit them back out without CPU intervention. This allows for dramatically more complicated processing, as you no longer need to consistently get a new sample to the DAC before the next deadline (often this would need done 48,000 times a second!) Basically, DMA lets you offload some processing from the CPU. Problem? Now you need to write memory that something else is trying to access. So, how do we fix this? Well, there’s a pretty easy solution:
A ping pong buffer.
Essentially, we can just alternate back and forth between the DMA device “owning” half of the memory and the CPU owning half, alternating who gets what half every time the DMA indicates that it ran out of samples.
Note, here I’m talking about DMA as if they only apply to DACs and ADCs; however, they can be used for many other things. Commonly, this includes networking and writing to displays, though there are many other times they’re useful. So, keep this in mind.
Want to know more about ADCs and DACs? Here are some links:
Retrotechtacular: The Forgotten Vacuum Tube A/D Converters of 1965 (Hackaday)
Project 4 - LEDs… again? #
[TODO] Power with transistors, filtering, PWM. Color input from temp and magnetic field sensors
Project 5 - Euclidean Rhythms #
[TODO] Power with high, spiky loads, code with events and scheduling, watchdogs- using stepper, servo, and solenoids
Project 6 - The Epochalypse #
[TODO] low power (sleep states), graphics (eink), RTC
only 24 most significant bits, which should only change every 255 seconds, or every 4.25 minutes. Plenty of time to sit in sleep mode
[TODO] From Zero to main() (Interrupt)
Real Time Operating Systems #
RIOT-OS, MBED, etc
[TODO note, MBED was used on the euclidean drum project for its event queue]
talk about scheduling (CFS, etc.)
Intrinsic Operations & ASM #
Your Instruction Set Architecture (ISA)
- different operations may take a different number of instructions
- Pipelining may make this hard to predict, especially with interrupts
Project 7: ASM Blink #
Other weird and cool projects: #
“The Simplest of Pseudo Random Number Generators” - Hackaday
Reverse Engineering an Unknown Microcontroller (Dmitry.GR)
Chapter 14.1 - Embedded Hardware comparison #
[TODO, Pi V RockPi4 V Arduino V x86, ref architecture information from chapter 3.3]
mention pi SD card performance / stability limits and pi advantages in how common it is
Arduino ≠ Arduino #
STM 32 #
The ‘Black Pill’ (STM32F411) is replacing the ‘Blue Pill’ (STM32F103) (Hackaday)
Archive.org link to TweetFirst up is the brains of the operation: an STM32F103. Not a lightweight chip: It's a Cortex M3 @ 72MHz. It's got 256kB of flash and 48kB of RAM and that's a 100-pin TQFP package!https://t.co/oPCeo7XMpe pic.twitter.com/niDPuIFBPT
— Stargirl 🌠 (@theavalkyrie) November 17, 2020
Getting Started in Robotics (Arthur Allshire’s Blog)
14.2 - Projects I recommend #
- Hand wiring a keyboard: https://docs.qmk.fm/#/hand_wire?id=hand-wiring-guide